April 2012
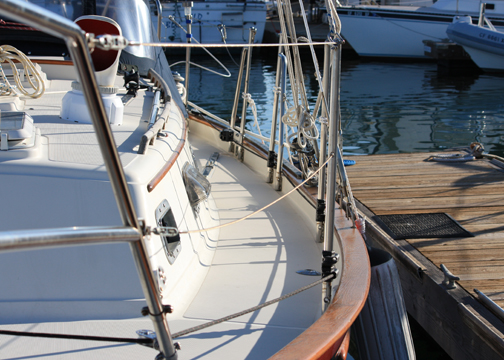
New roller furling – Mar
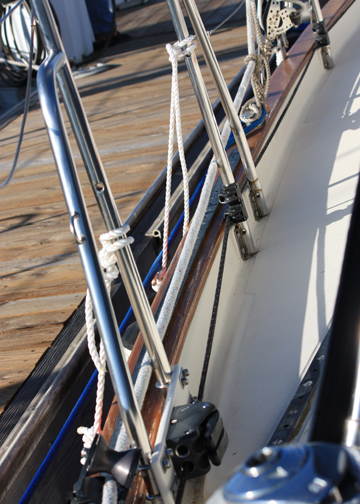
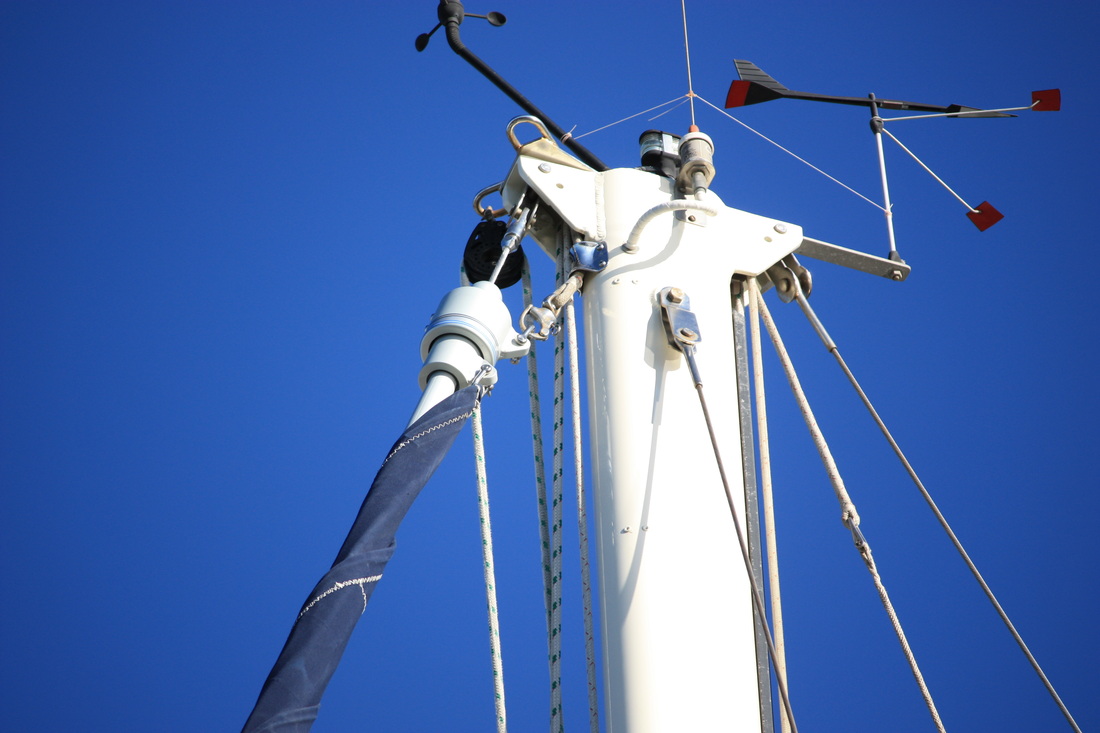
2012. Indigo came with two Harken
roller furlers. An older MK I model on
the jib, and a newer MK III model on the staysail. I was originally going to keep these units,
but at the last minute I changed my mind and decided to replace them. It's easier to replace them now
while I had a job, then it would be later on while cruising without a
paycheck. Also, now was the time to
change them out before I made all the measurements for the new sails (which was
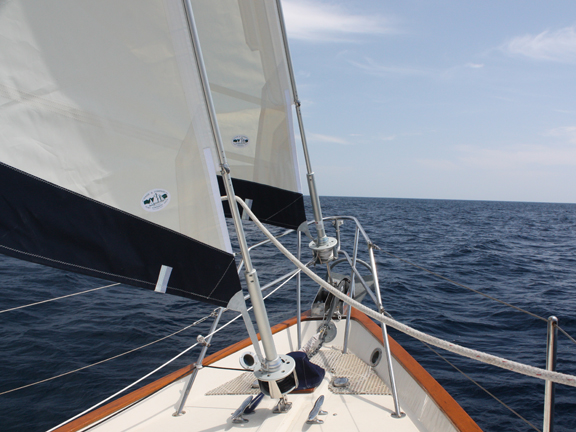
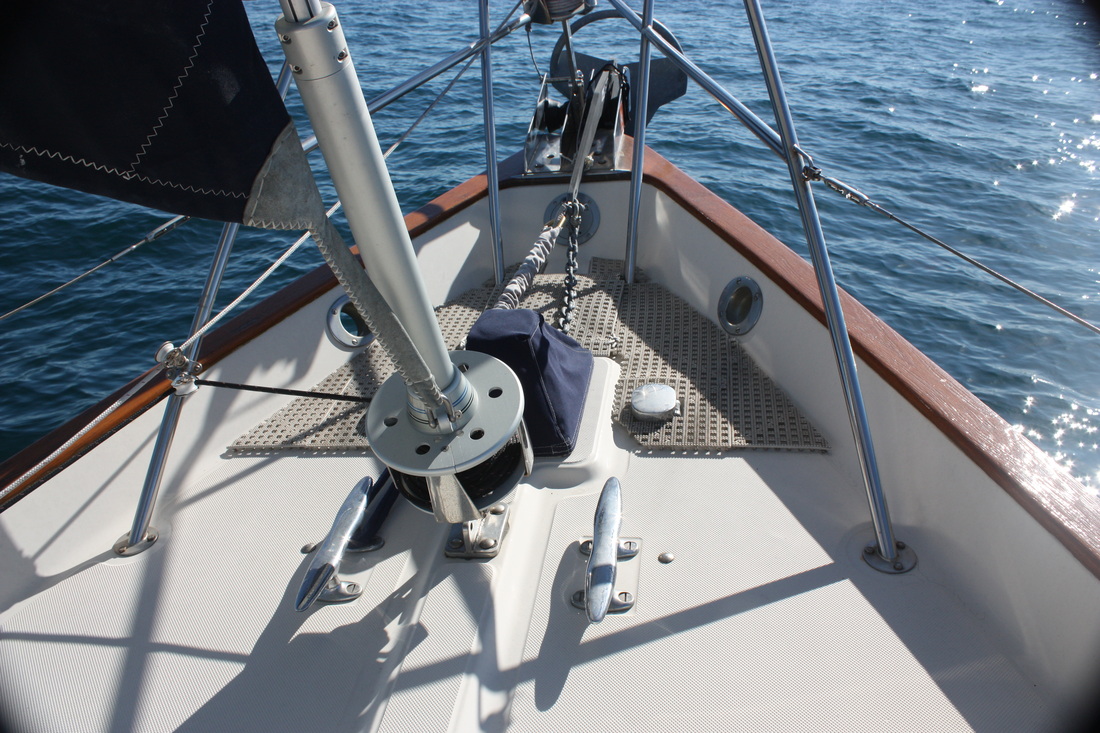
good, because I raised the jib drum 10 inches in order to better handle the anchor).
Besides, when it comes to critical components, like the rigging, I decided to
just replace it and not have to worry about it later during a storm, 1500 miles
from civilization.
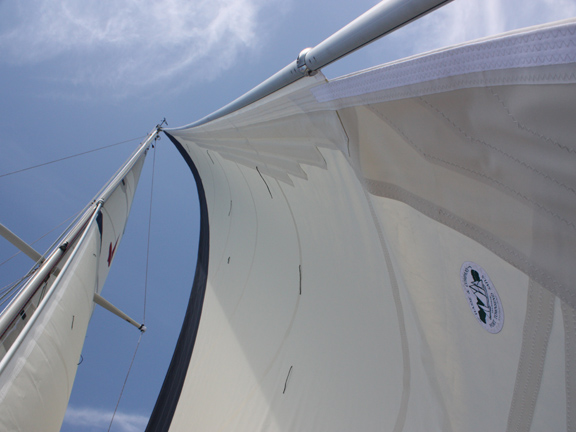
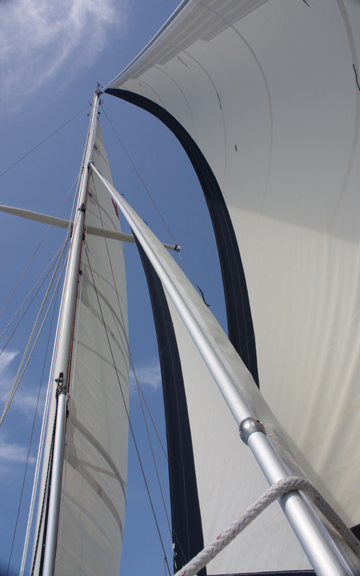
So the search began, and I had 3 options. Harken, Schaefer, and Pro-furl. All three had a great reputation and any of them would have worked fine – just look at numerous blogs of boats out cruising with all three models. However, I had to choose. Harken – It just didn’t seem robust to me even though they have a great reputation. Pro-furl – I liked the unit, but I didn’t like the sealed bearings which were supposed to be maintenance free. Nothing lasts forever on a boat, and you cannot replace these bearings without sending the unit back to the manufacturer. The Schaefer 2100 unit was over built and overkill for a 34 foot boat – perfect!
I decided to do the install myself – how hard can it be, I thought. I bought Brion Toss’ rigging book, spent hundreds of hours researching mechanical fittings and then bought Toss’ video on installing Sta-Lok fittings. Indigo had ¼” rigging, but I wanted to go bigger – nothing too strong ever broke. But I was limited to a ½” clevis pin size unless I wanted to do major surgery to the mast and chainplates. So, I went one size larger to 9/32” which was the largest size furler that used ½” pins.
I bought the furler, the wire, and fittings from Rigging Only.com. Their customer service is excellent. After I had picked everything out online and hit send, I got a phone call the next day. The service rep informed me that I could save a hundred dollars if I deleted the extended tang for the jib furler and bought the furler with the tang already included, which I hadn’t seen on the website. Awesome. Who does that? They were also great when I had questions later on about installation issues (read on).
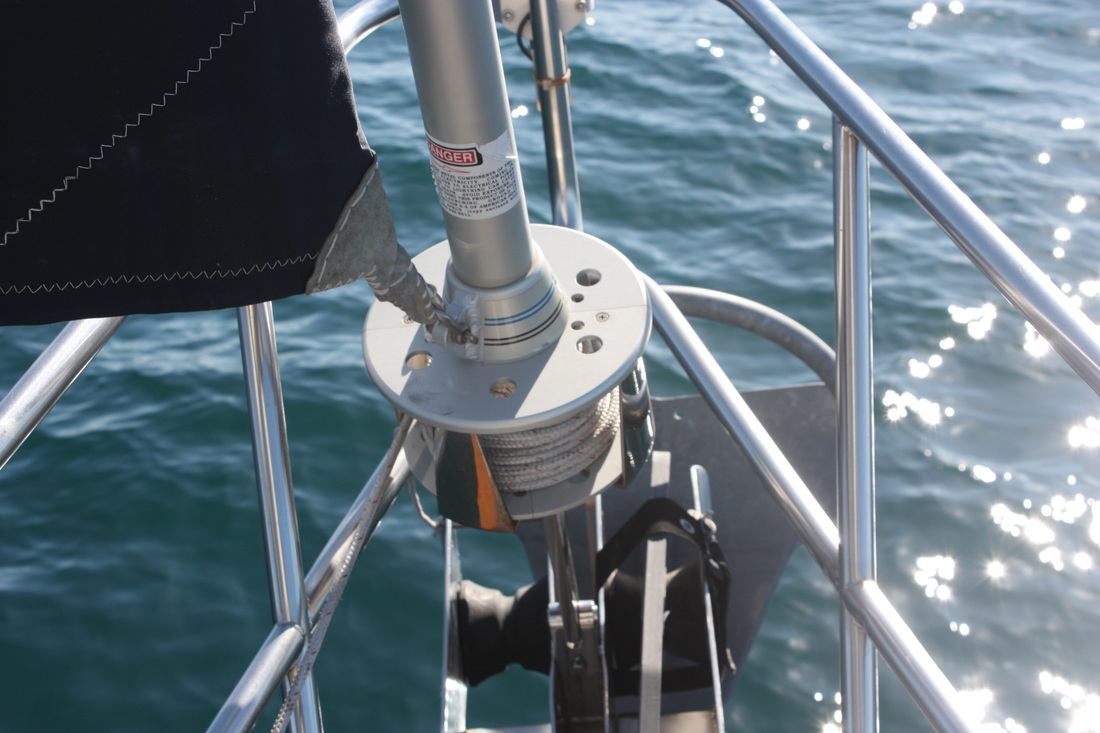
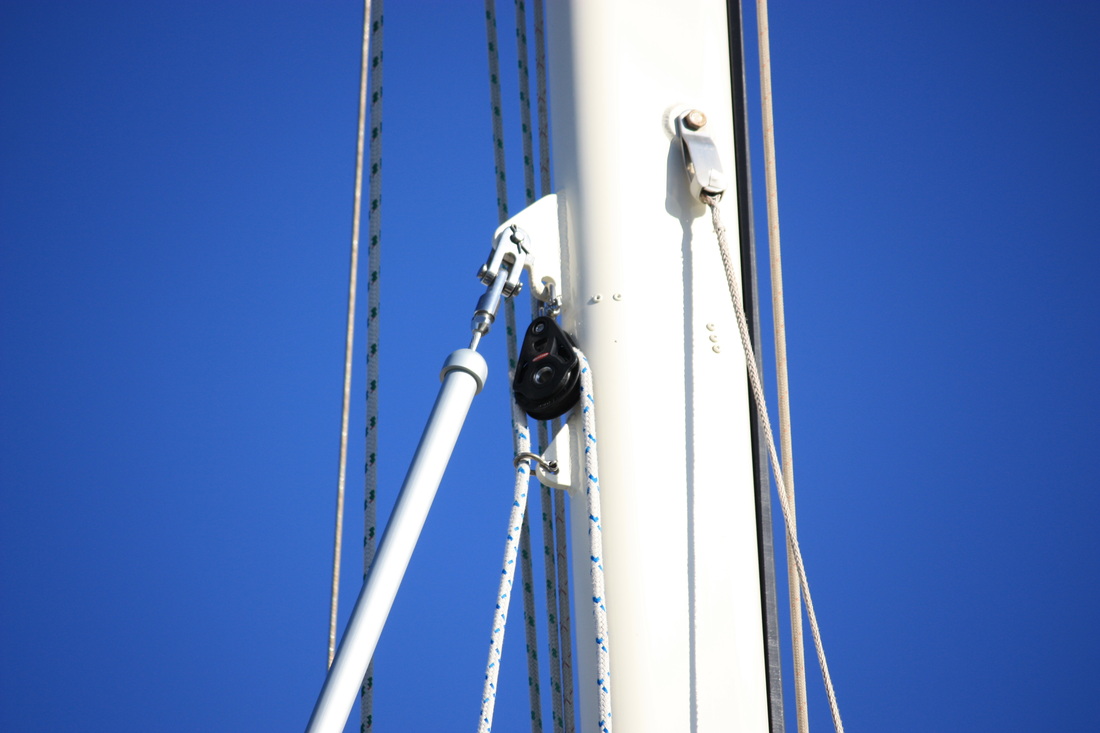
The Schaefer 2100 was pretty simple to assemble and had clear directions. The sections are riveted together with stainless rivets, which are not easy to use with standard rivet guns found at home depot. Instead, I found the Marson 39010 “Big Daddy” rivet gun which handled the job easy. I was careful to use Tef-Gel on each rivet so as not to get galvanic corrosion between the SS rivets and aluminum sections.
I made three mistakes. First was assembling the Sta-Loks. The process is pretty straight forward and I followed Toss’ video to a T. But, as I was tightening the fitting it would grind to a halt and I couldn’t tighten it down or back it off. The stainless galled and locked the fitting solid – basically destroyed. I didn’t know what I did wrong and tried again but more carefully on another fitting with the same results. So now my confidence was shot, and I had thrown away $100. I called Rigging Only and the rep said they almost never hear of this problem. He suggested putting a little Loctite on the fitting to lubricate the joint. In the video you assemble the fitting and tighten it down and then take the fitting apart to make sure the wire strands are bent down correctly. Then you put on Loctite and tighten it down. So I went back and added Loctite for the first fitting and it worked perfectly. I didn’t have any other problems with the Sta-Loks.
The second mistake was a stupid measuring error on the staysail. I pulled the old rigging down and laid it down on the dock and used it as a reference for sizing the new rigging. However, I forgot about the extra toggle (2” long) I needed to add into the measurement for the new stay. The result was that my new rigging was 2” too long. I was able to tighten the turnbuckle enough to take up the slack, but I used almost all of the travel in the turnbuckle. I still need to take the staysail down, lop off two inches and put it back up. Luckily I only have to shorten the wire and not the furler section.
Third mistake: I was in a hurry at the end of the day trying to get the furler up before I ran out of daylight. I enlisted some help from the marina and hoisted the furler up the mast and then I climbed the mast pinned it in place, came down and tightened the turnbuckle – this time it fit perfectly. Done – I’m a genius. Until I walked into the cockpit and saw the swivel sitting there (the part that the head of the sail attaches and is raised up the furler). Damn – I’m an idiot. That piece is supposed to be slid down from the top of the furler down to the bottom. My help was gone and I really didn’t want to take the whole thing down again. Not to mention, you are tempting fate, as you really don’t want the foil sections to bend too much and kink or break in half. Since I had taken the furler apart multiple times by now I was able to disconnect the unit at the bottom and dissemble the bottom half so that I could slip the swivel on from the bottom and then reassemble everything – finally, success.
I learned two important things by doing this project myself. First, I had no idea how my previous furlers worked or how to maintain them. Frankly, they intimidated me. Not so, on the new ones. I can take them completely apart and put them back together again in minutes. I also learned some important operational tips that I wouldn’t have known otherwise, which also helped in ensuring that the sails were cut correctly. Second, I would have carried mechanical fittings “just in case” but would have been useless because I probably would have destroyed them trying to assemble them like I did here. Learning to do something for the first time on a pitching deck in the middle of the ocean, without the help of the internet, is not the preferred method.
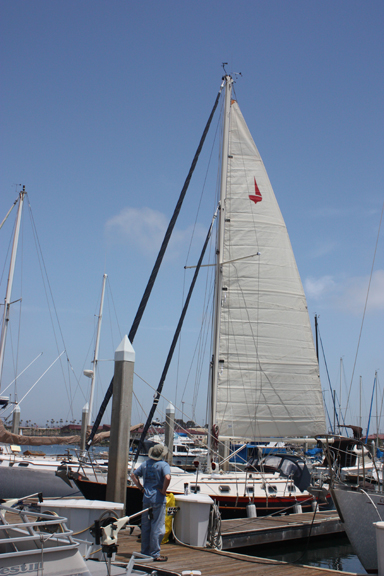
One last note: I looked everywhere, to no avail, on the internet trying to figure out the right way to hoist the completed furlers up the mast. I heard of stories where it all went bad, but never how it went. I didn’t take pictures, because I was short handed, but here is how I did it. I set the furler in front of the boat with the top of the furler pointing towards the boat and the bottom the farthest away from the bow. Tie a halyard onto the furler (I backed it up with some duct tape) and found two other people to help support the furler. I started on the dock holding the top end and pulled the halyard, raising the furler. It would have been easier with one other person though. If you keep tension on the line it will limit the bend in the foils – like keeping a string tensioned between two people. The middle person will only be able to help for a short time until it goes too high past his reach. However, the person holding the bottom of the furler needs to keep some back pressure as he walks it forward as it rises. This tension keeps the foils from bending too much. Once I had the furler raised vertically, I tied it off and climbed the mast, pinned the top, then came down and finished connecting the bottom.
So the search began, and I had 3 options. Harken, Schaefer, and Pro-furl. All three had a great reputation and any of them would have worked fine – just look at numerous blogs of boats out cruising with all three models. However, I had to choose. Harken – It just didn’t seem robust to me even though they have a great reputation. Pro-furl – I liked the unit, but I didn’t like the sealed bearings which were supposed to be maintenance free. Nothing lasts forever on a boat, and you cannot replace these bearings without sending the unit back to the manufacturer. The Schaefer 2100 unit was over built and overkill for a 34 foot boat – perfect!
I decided to do the install myself – how hard can it be, I thought. I bought Brion Toss’ rigging book, spent hundreds of hours researching mechanical fittings and then bought Toss’ video on installing Sta-Lok fittings. Indigo had ¼” rigging, but I wanted to go bigger – nothing too strong ever broke. But I was limited to a ½” clevis pin size unless I wanted to do major surgery to the mast and chainplates. So, I went one size larger to 9/32” which was the largest size furler that used ½” pins.
I bought the furler, the wire, and fittings from Rigging Only.com. Their customer service is excellent. After I had picked everything out online and hit send, I got a phone call the next day. The service rep informed me that I could save a hundred dollars if I deleted the extended tang for the jib furler and bought the furler with the tang already included, which I hadn’t seen on the website. Awesome. Who does that? They were also great when I had questions later on about installation issues (read on).
The Schaefer 2100 was pretty simple to assemble and had clear directions. The sections are riveted together with stainless rivets, which are not easy to use with standard rivet guns found at home depot. Instead, I found the Marson 39010 “Big Daddy” rivet gun which handled the job easy. I was careful to use Tef-Gel on each rivet so as not to get galvanic corrosion between the SS rivets and aluminum sections.
I made three mistakes. First was assembling the Sta-Loks. The process is pretty straight forward and I followed Toss’ video to a T. But, as I was tightening the fitting it would grind to a halt and I couldn’t tighten it down or back it off. The stainless galled and locked the fitting solid – basically destroyed. I didn’t know what I did wrong and tried again but more carefully on another fitting with the same results. So now my confidence was shot, and I had thrown away $100. I called Rigging Only and the rep said they almost never hear of this problem. He suggested putting a little Loctite on the fitting to lubricate the joint. In the video you assemble the fitting and tighten it down and then take the fitting apart to make sure the wire strands are bent down correctly. Then you put on Loctite and tighten it down. So I went back and added Loctite for the first fitting and it worked perfectly. I didn’t have any other problems with the Sta-Loks.
The second mistake was a stupid measuring error on the staysail. I pulled the old rigging down and laid it down on the dock and used it as a reference for sizing the new rigging. However, I forgot about the extra toggle (2” long) I needed to add into the measurement for the new stay. The result was that my new rigging was 2” too long. I was able to tighten the turnbuckle enough to take up the slack, but I used almost all of the travel in the turnbuckle. I still need to take the staysail down, lop off two inches and put it back up. Luckily I only have to shorten the wire and not the furler section.
Third mistake: I was in a hurry at the end of the day trying to get the furler up before I ran out of daylight. I enlisted some help from the marina and hoisted the furler up the mast and then I climbed the mast pinned it in place, came down and tightened the turnbuckle – this time it fit perfectly. Done – I’m a genius. Until I walked into the cockpit and saw the swivel sitting there (the part that the head of the sail attaches and is raised up the furler). Damn – I’m an idiot. That piece is supposed to be slid down from the top of the furler down to the bottom. My help was gone and I really didn’t want to take the whole thing down again. Not to mention, you are tempting fate, as you really don’t want the foil sections to bend too much and kink or break in half. Since I had taken the furler apart multiple times by now I was able to disconnect the unit at the bottom and dissemble the bottom half so that I could slip the swivel on from the bottom and then reassemble everything – finally, success.
I learned two important things by doing this project myself. First, I had no idea how my previous furlers worked or how to maintain them. Frankly, they intimidated me. Not so, on the new ones. I can take them completely apart and put them back together again in minutes. I also learned some important operational tips that I wouldn’t have known otherwise, which also helped in ensuring that the sails were cut correctly. Second, I would have carried mechanical fittings “just in case” but would have been useless because I probably would have destroyed them trying to assemble them like I did here. Learning to do something for the first time on a pitching deck in the middle of the ocean, without the help of the internet, is not the preferred method.
One last note: I looked everywhere, to no avail, on the internet trying to figure out the right way to hoist the completed furlers up the mast. I heard of stories where it all went bad, but never how it went. I didn’t take pictures, because I was short handed, but here is how I did it. I set the furler in front of the boat with the top of the furler pointing towards the boat and the bottom the farthest away from the bow. Tie a halyard onto the furler (I backed it up with some duct tape) and found two other people to help support the furler. I started on the dock holding the top end and pulled the halyard, raising the furler. It would have been easier with one other person though. If you keep tension on the line it will limit the bend in the foils – like keeping a string tensioned between two people. The middle person will only be able to help for a short time until it goes too high past his reach. However, the person holding the bottom of the furler needs to keep some back pressure as he walks it forward as it rises. This tension keeps the foils from bending too much. Once I had the furler raised vertically, I tied it off and climbed the mast, pinned the top, then came down and finished connecting the bottom.