May 2010
Before and After
Monitor windvane – May
2010.
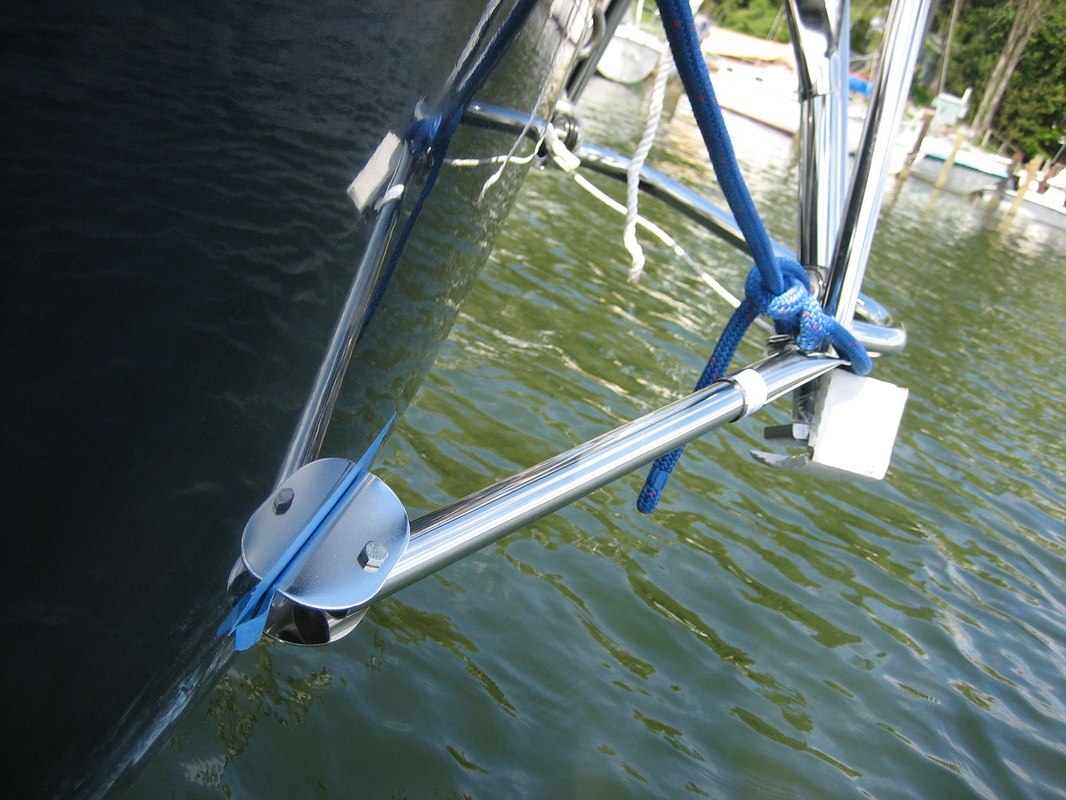
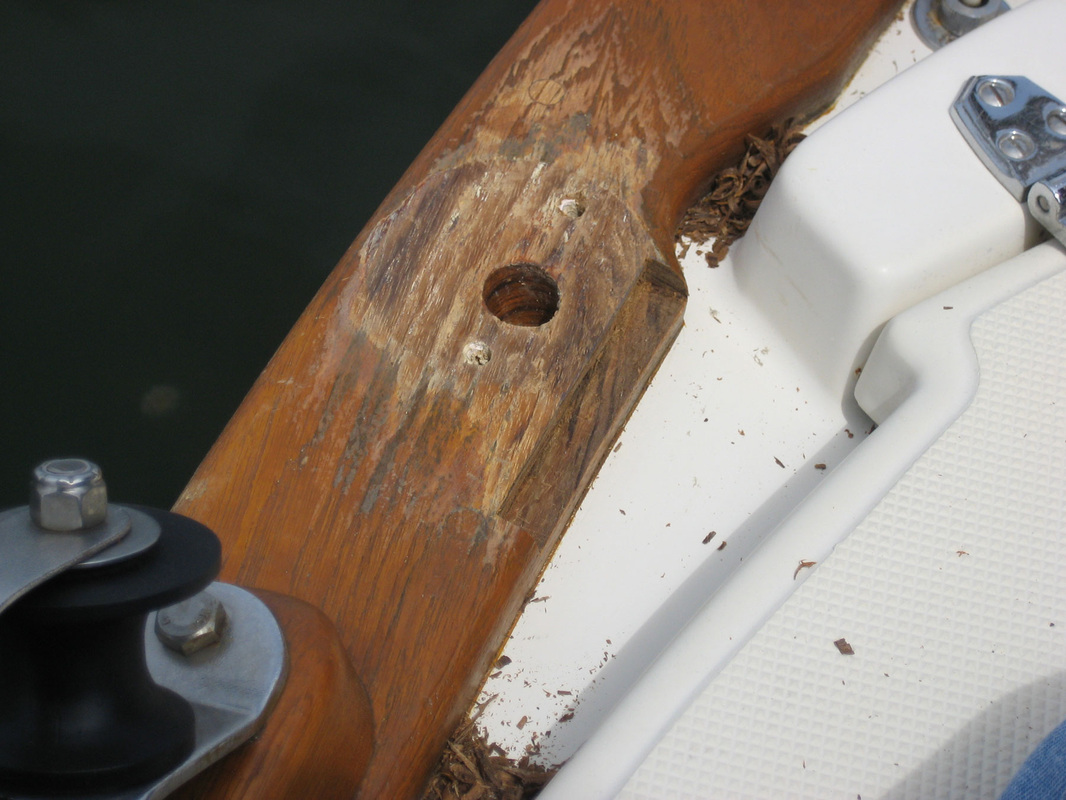
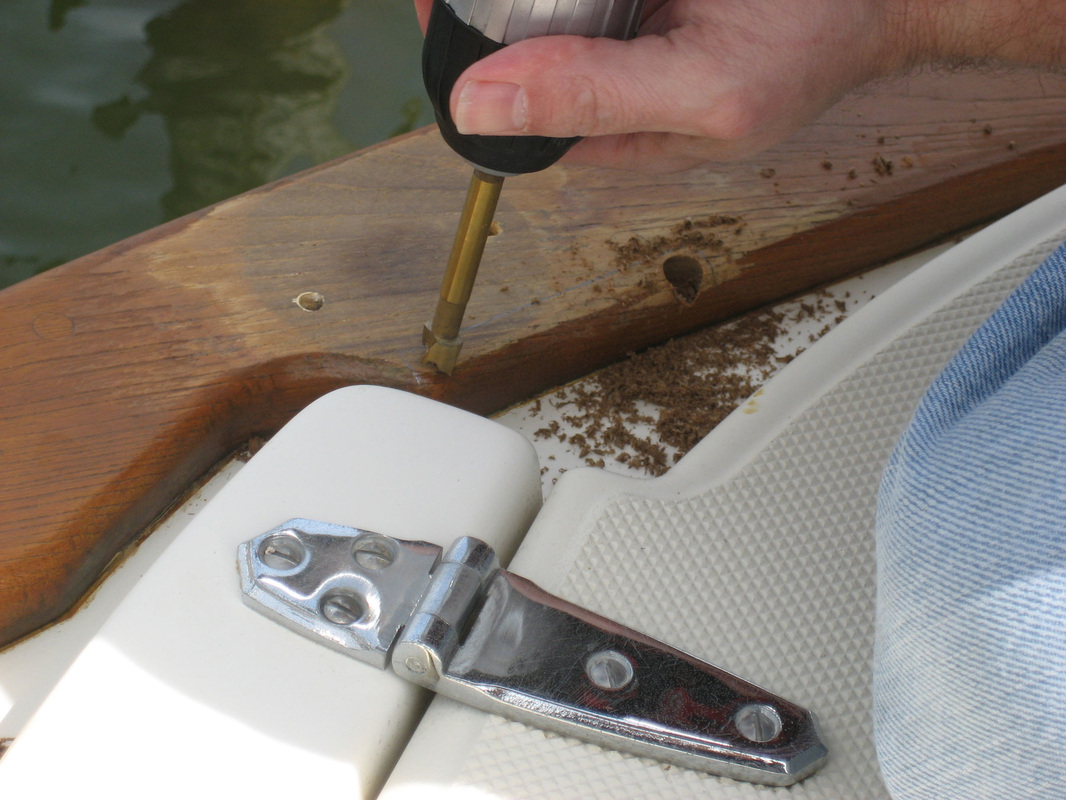
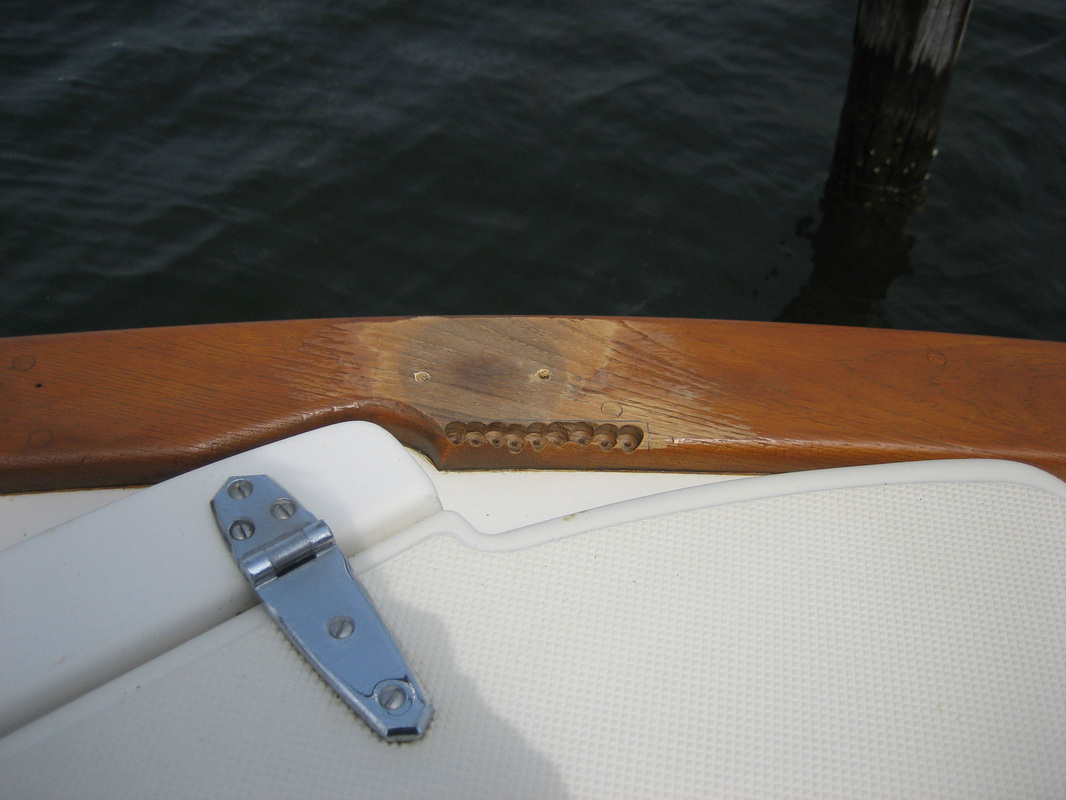
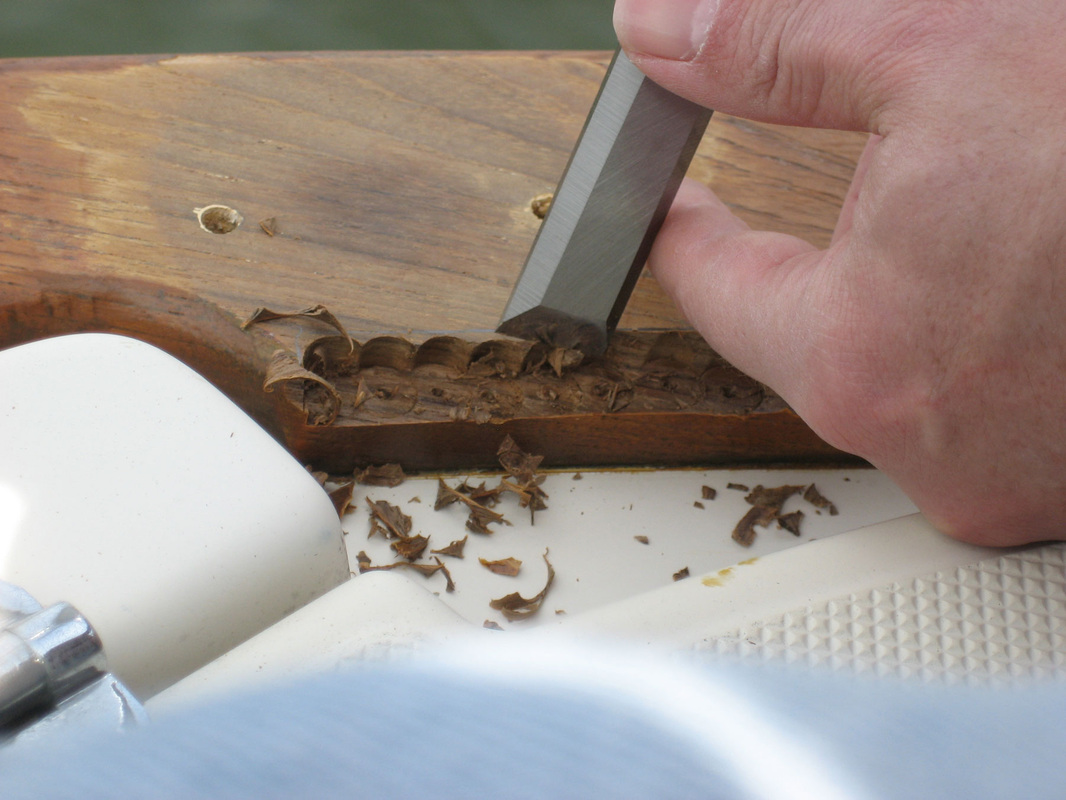
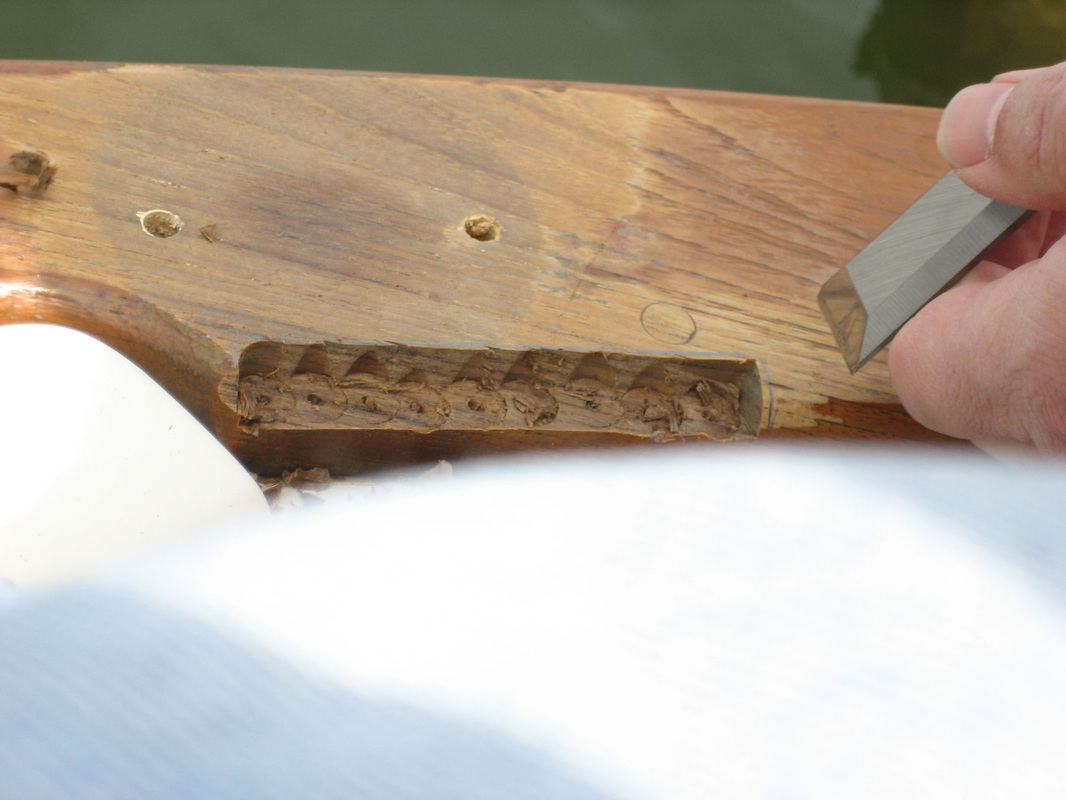
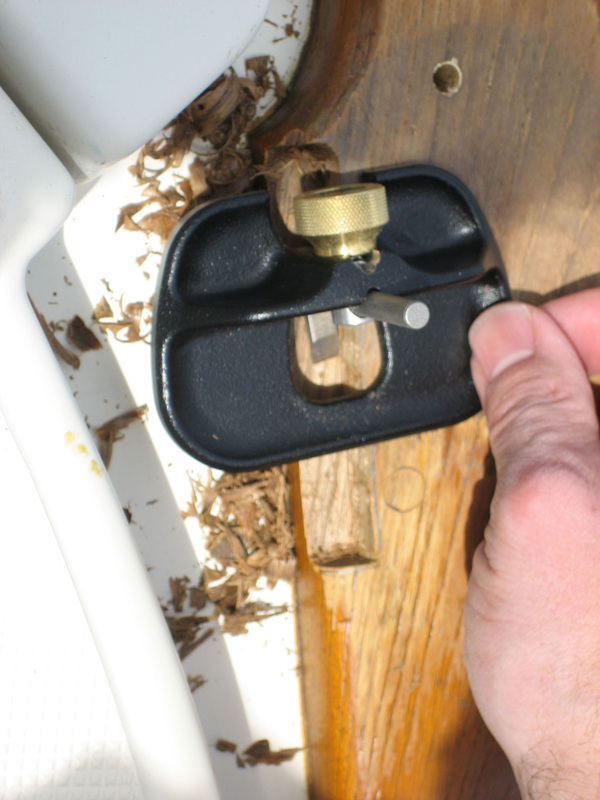
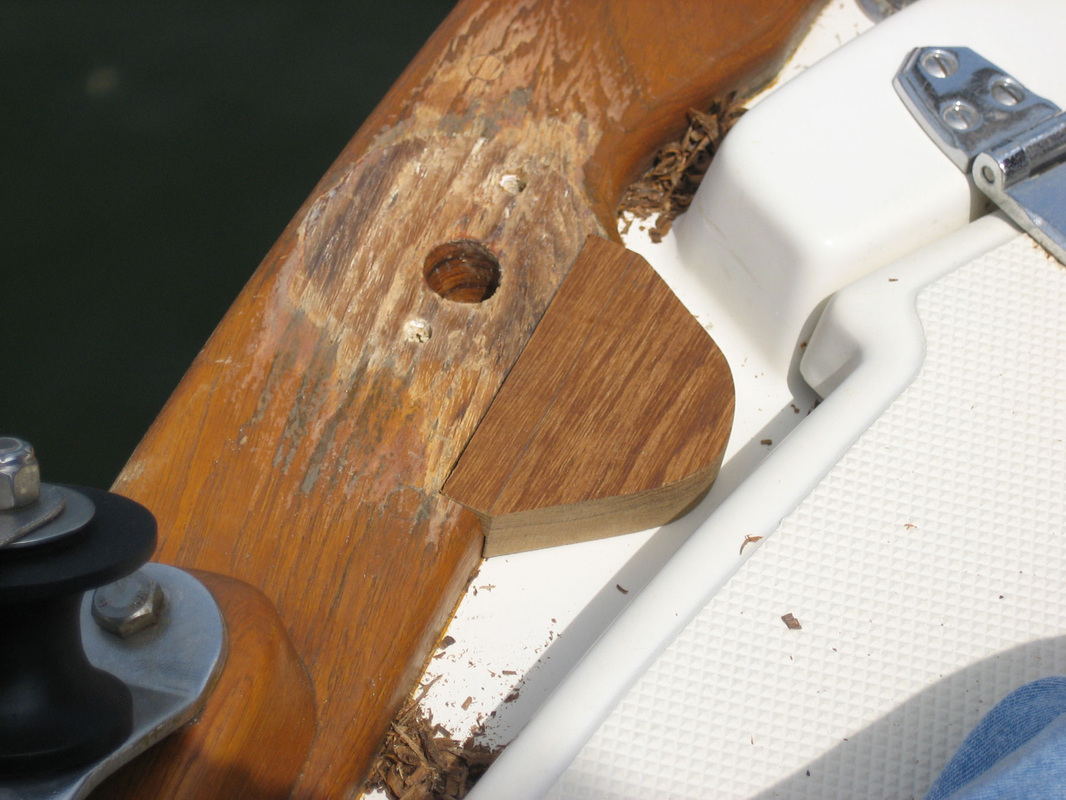
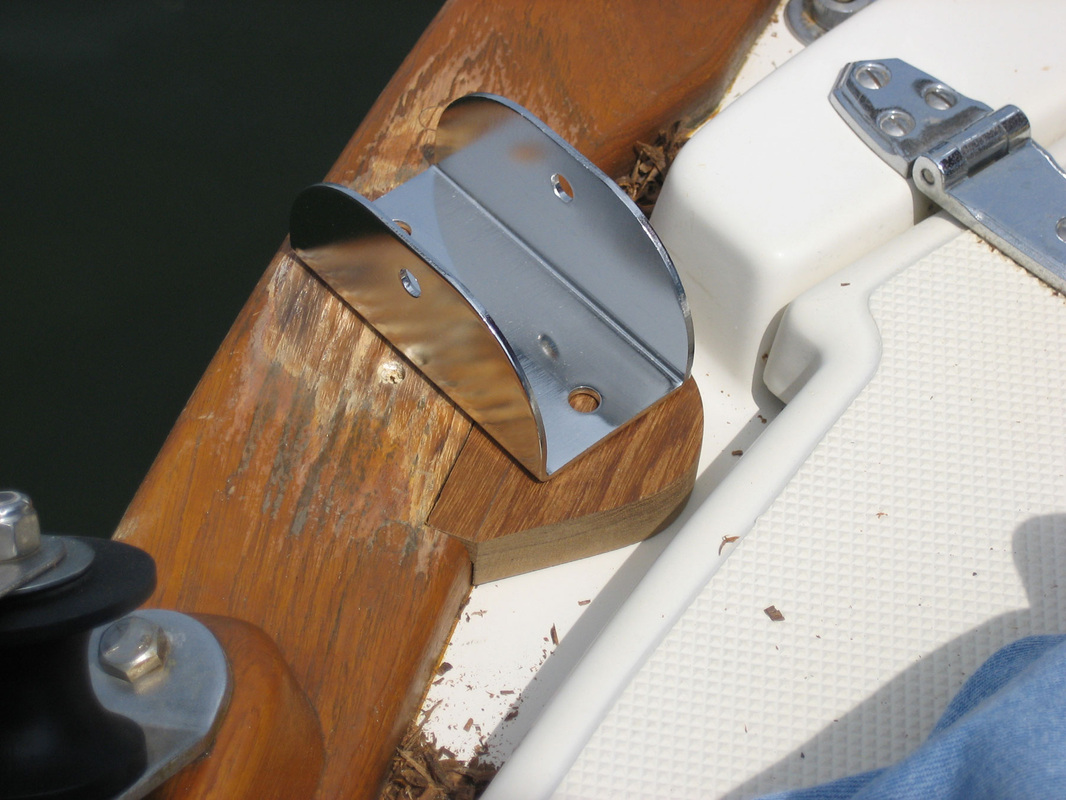
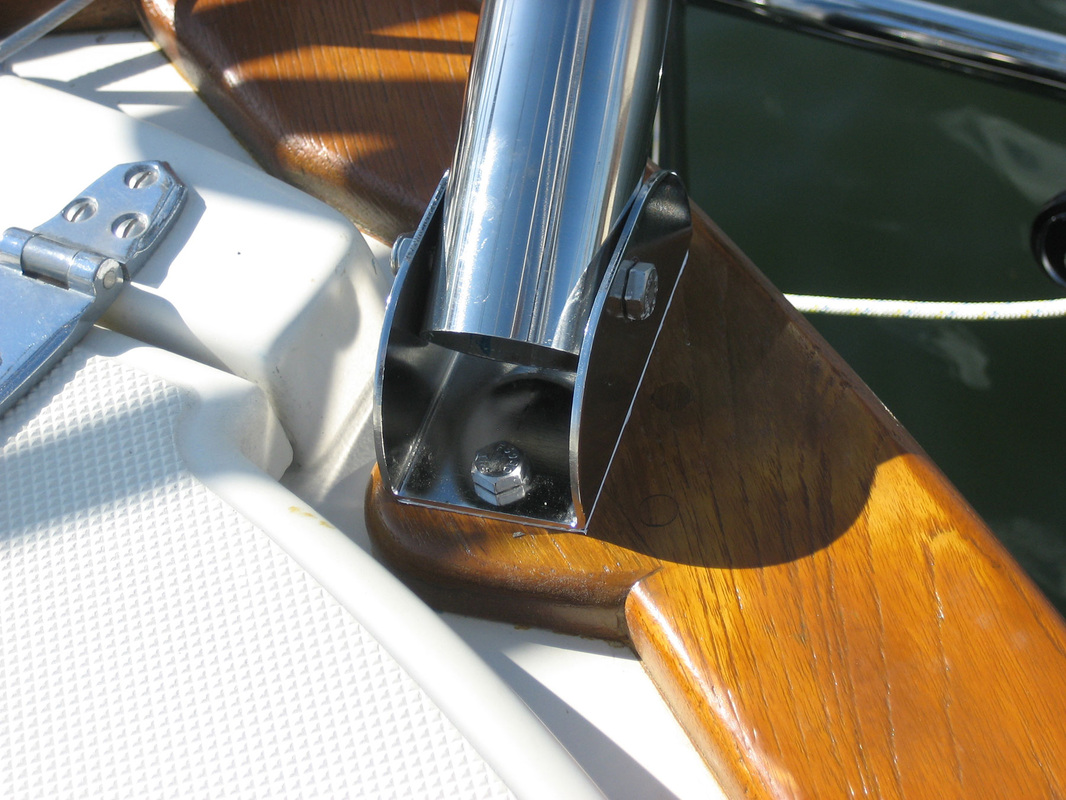
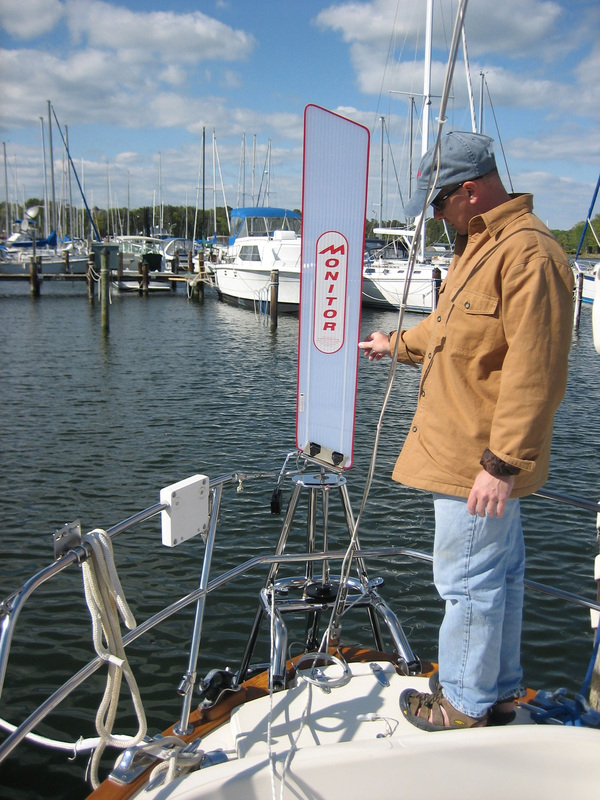
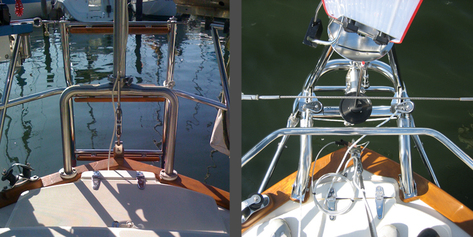
I’ve read the arguments for and against auto-pilots and windvanes. I have read too many stories of cruisers having to hand steer after the electronic auto-pilot gave up the ghost. I felt more comfortable with a windvane: steers better in high winds, uses no electricity, can be fixed/jury rigged with simple tools. I understand mechanical things and can troubleshoot when they stop working, but electronics are magic boxes to me. I looked at all of the available manufacturers and kept coming back to Monitor. Everyone who had one loved it, they are mostly bullet proof, and customer service was second to none. Installation was straight forward but I had a couple of hurdles for mine. First, I had to take down the radar pole. The Monitor feet mounted in the same place as the radar pole and the wind vane itself would have contacted the pole with the wind at certain angles. Second, the feet were too long and hung off of the narrow caprail. Spacers were the obvious choice, but I loathe to mess up the looks of our boat, so I wanted something that looked factory original. Scanmar’s website had a picture of someone who solved the problem by adding teak blocks that were integrated into the caprail. I made some mock up blocks, made sure they would fit correctly and then recreated them in teak. The harder part was making them look like part of the original caprail. I couldn’t fit a router into the space, due to the life line rails, so after carefully marking the caprail, I used a drill to bore a series of holes almost to depth. Then I used a chisel to carefully pare out the waste up to the marked line. Next, I used a hand router – basically a 90 degree chisel with a depth stop. This allowed me to make the cutout dead flat. Lastly, I glued the blocks to the caprail and epoxied the bottom of the blocks to the fiberglass deck. Once sanded and varnished, I think they look professionally done.
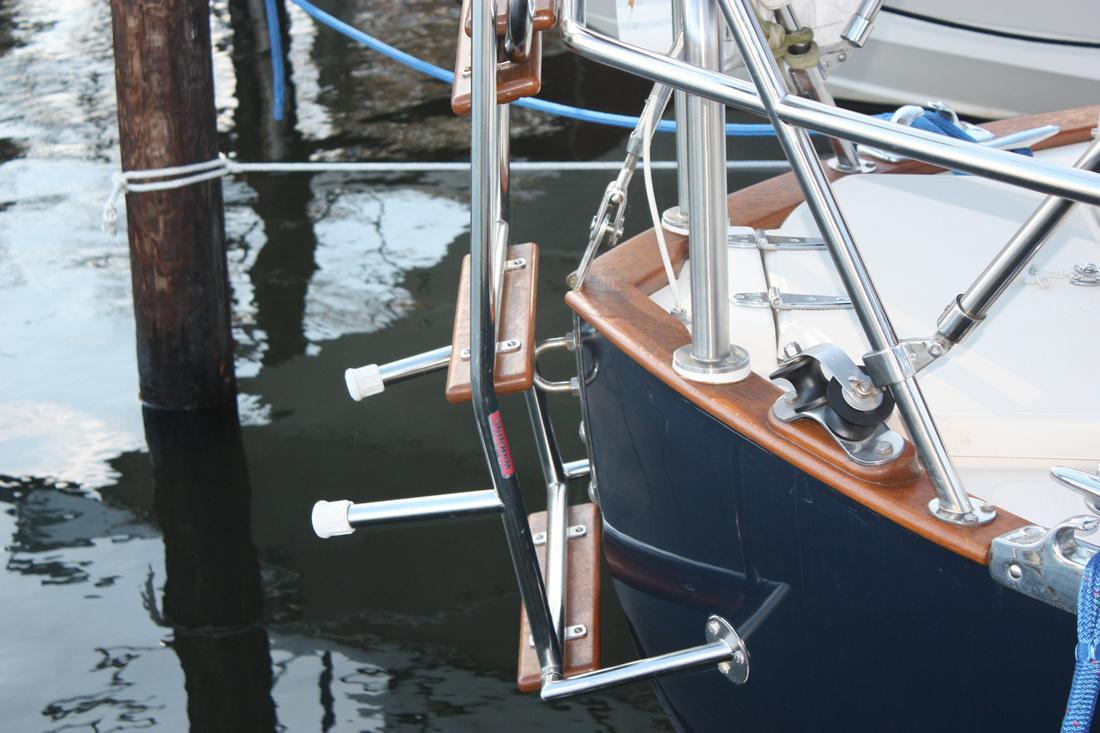
The final challenge was what to do with the boarding ladder mounted where the Monitor needed to be. Removing the ladder was easy but I realized the hull had been painted blue after the ladder was mounted, as I was greeted with two 3” white circles. I knew that I would never be able to match the blue paint, so I found some black ¼” Starboard and was going to epoxy them over the white spots. It would look much better than it did now, but it would still look “off”. I told Jay, the previous owner what I was going to do and he suggested using stainless pad eyes. Brilliant. It stands out more than the black circles, but the pad eyes look like they have a purpose – a different purpose than hiding white gel coat. And we use them to tie a line for our dinghy painter at anchor.
I’ve read the arguments for and against auto-pilots and windvanes. I have read too many stories of cruisers having to hand steer after the electronic auto-pilot gave up the ghost. I felt more comfortable with a windvane: steers better in high winds, uses no electricity, can be fixed/jury rigged with simple tools. I understand mechanical things and can troubleshoot when they stop working, but electronics are magic boxes to me. I looked at all of the available manufacturers and kept coming back to Monitor. Everyone who had one loved it, they are mostly bullet proof, and customer service was second to none. Installation was straight forward but I had a couple of hurdles for mine. First, I had to take down the radar pole. The Monitor feet mounted in the same place as the radar pole and the wind vane itself would have contacted the pole with the wind at certain angles. Second, the feet were too long and hung off of the narrow caprail. Spacers were the obvious choice, but I loathe to mess up the looks of our boat, so I wanted something that looked factory original. Scanmar’s website had a picture of someone who solved the problem by adding teak blocks that were integrated into the caprail. I made some mock up blocks, made sure they would fit correctly and then recreated them in teak. The harder part was making them look like part of the original caprail. I couldn’t fit a router into the space, due to the life line rails, so after carefully marking the caprail, I used a drill to bore a series of holes almost to depth. Then I used a chisel to carefully pare out the waste up to the marked line. Next, I used a hand router – basically a 90 degree chisel with a depth stop. This allowed me to make the cutout dead flat. Lastly, I glued the blocks to the caprail and epoxied the bottom of the blocks to the fiberglass deck. Once sanded and varnished, I think they look professionally done.
The final challenge was what to do with the boarding ladder mounted where the Monitor needed to be. Removing the ladder was easy but I realized the hull had been painted blue after the ladder was mounted, as I was greeted with two 3” white circles. I knew that I would never be able to match the blue paint, so I found some black ¼” Starboard and was going to epoxy them over the white spots. It would look much better than it did now, but it would still look “off”. I told Jay, the previous owner what I was going to do and he suggested using stainless pad eyes. Brilliant. It stands out more than the black circles, but the pad eyes look like they have a purpose – a different purpose than hiding white gel coat. And we use them to tie a line for our dinghy painter at anchor.